“How to Check AC Gas Level at Home?” can help when you need to understand how to check the levels without the help of any equipment. One of the worst experiences is to come home after a long, hot day only to discover that the Air conditioner is not working well. However, the reasons can be plenty and sometimes very trivial as well. Running out of gas is one of the most common yet often overlooked reasons for the Air conditioner not working well enough. Also known as the refrigerant, the ‘Air conditioner often runs out of gas. Likewise, there can also be other reasons that include dirty filters or a problem with the thermostat. In this article, we will learn how to check gas levels in split ac or any other type.
To check, you need to follow the below steps.
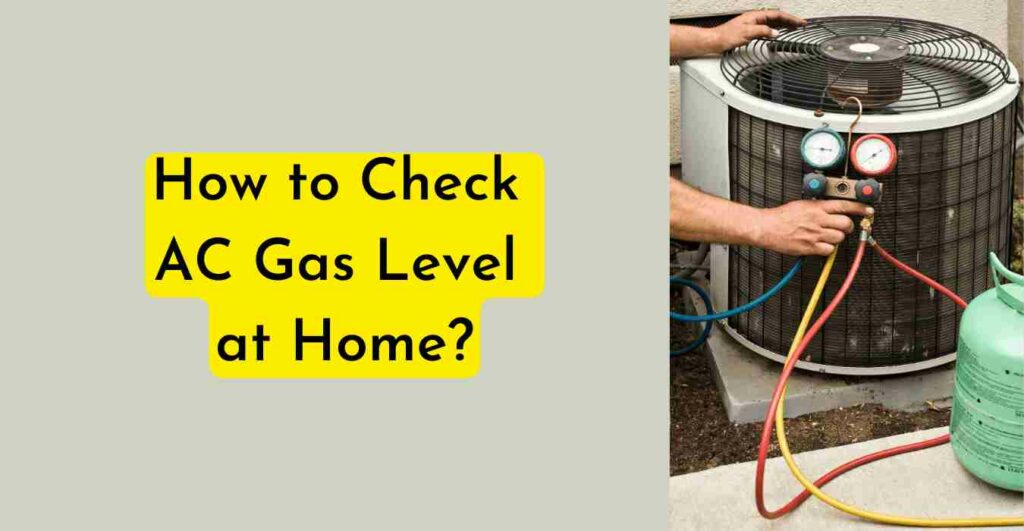
Requirements:
- Gloves
- and Protective Eyeglasses.
- A vacuum pump
- AC manifold gauge set
- Refrigerant
The Process
- To start with, locate the suction line of the Air conditioner. This is usually found on the lower side of most models. Also, locate the discharge line, which is generally located on the high side. These two parts can be easily found on the backside of the Window AC and in the outdoor part of the Split Air Conditioner.
- The suction line is usually located just above the discharge line and is often cool to the touch. This is used to recharge the gas into the AC unit.
- Now, you need to unscrew the bolts of the suction line. Use the Hex keys to unscrew, as this screw is much like a valve preventing refrigerant from flowing in or out.
- Now, you will observe a bolt on the left side where you can connect the Blue hose of the AC manifold gouge to the port. Now, you need to connect the Yellow hose to the Vaccum pump.
- Next, remove all the air from the system. This is crucial as it ensures that any trapped moisture within the compressor can cause damage.
- Next, make sure to check the AC manifold gauge for the valves and close them properly.
- Now connect the Yellow home to the refrigerant tank. Before you open the tank knob, loosen the Yellow hose at the manifold end. This is followed by opening the cylinder knob for a second and closing it gently.
- This is an important part of the process as it removes all the trapped air from within the pipes. Finally, tighten the yellow hose.
- Next, open the low side knob of the manifold for about a few seconds and shut it down.
- After this, you need to turn ON the AC and wait for the compressor to start.
- Once the compressor starts, you can open the low side valve of the manifold. Keep it open for a few seconds and close it back.
- It is at this point that you need to check at what reading the gauge reading settles at.
- Repeat the process repeats until the pressure settles between 60-70 psi.
- Once the required reading has been reached in the required range, you need to:
- Close the manifold valve
- Close the refrigerant tank knob
- Open the Blue hose from the suction line
- Open the Yellow hose from the refrigerant tank.
- You are done.
Types of Air Conditioner Gases
Few people know this, but before you learn how to check split ac gas levels at home, you need to know about the different gas types in the appliance.
R410A
This is also known as the Puron, which is the brand name and is a commonly used gas in all the latest models of Air conditioners. This is a Hydro-Flourocarbon or HFC and is safe for the environment as it does not affect the ozone layer. This AC gas type was considered a new standard by the US residential air conditioner systems back in 2015.
Also Read: Best Refrigerator in India
R22
This is also known as Freon and Hydro chlorofluorocarbons-HCFC. It is known to affect the ozone layer and is not an eco-friendly gas. This gas type has been banned and discontinued from residential air conditioners because of its harm to the environment.
What are the Reasons for Gas Leakage in Air Conditioners?
Let us take a look at some of the prime reasons for the reasons for gas leakage in Air conditioners:
Manufacturing Defect
This is one of the prime reasons, as most models and products are not free from defects. This could be in joints, and the welds hence can lead to leakage if not tightened up well enough. However, these repairs can be easily repaired while your product is still under warranty.
Improper Installation
There are times when the flare nut connections can be defective due to the installation process. This also leads to the copper pipes bending over, hence leading to leakages. It is recommended to ‘tape-up’ the flare nuts with Teflon tapes and to ensure that the Copper pipes are bent only through the Tube bender.
Common Wear and Tear
With time, the air conditioner can suffer big time wearing off of the parts that can lead to the leakage of the air conditioner gas. This usually occurs in joints and bolts that grow old with time.
How to Check AC Gas Level at Home?: The Conclusion
The refrigerant is a vital part of the Air conditioner and is important for the process of cooling that the Air conditioner is meant to offer. This is a substance that helps heat transfer from one part to the other part, thus cooling the area in the process. Refrigerants are gas or liquids found in fridges, vehicle air conditioners and freezers. In the case of the AC, the refrigerant is stored in the Copper Coils. As the hot air travels, the refrigerant absorbs the air, thus cooling in the process.
Related Post: